How to Run Mirror Sync with AOMEI Backupper
Mirror sync is a feature that ensures the newly added and modified files in the source directory will be synchronized to the target directory, and the files in the target directory will always be exactly the same as the files in the source directory. Files in the target directory that are inconsistent with those in the source directory will be deleted or overwritten.
File mirror sync is commonly used in the following scenarios:
Data Backup: By mirroring files to backup media or backup locations, redundant storage and data protection are achieved. In case of data loss or damage to the source files, the mirrored copy can be used for data recovery.
File Copying and Distribution: When there is a need to copy files between different systems or locations, file mirroring synchronization ensures that the copied files match the content of the source files exactly. This is useful in scenarios such as file distribution, file sharing, and file migration.
Data Synchronization: Maintaining data consistency across distributed systems or multiple nodes is a critical task. By using file mirroring synchronization, file replicas on different nodes can be kept synchronized, enabling the system to operate and compute based on the most up-to-date data.
How to Mirror Folders in Windows 11, 10, 8, 7 Easily
Prerequisites for mirror sync
- Download AOMEI Backupper Professional or higher version.
- Prepare a file to test
Detailed steps about how to do mirror sync under Windows
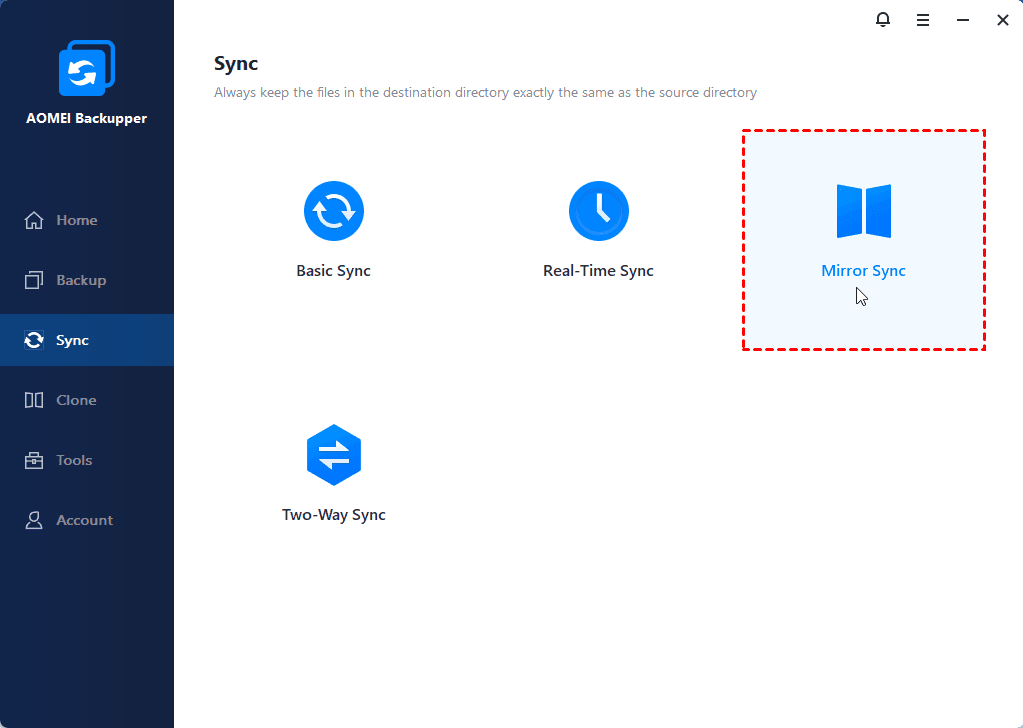
1. Click the "Sync" tab on the left side and then select "Mirror Sync".
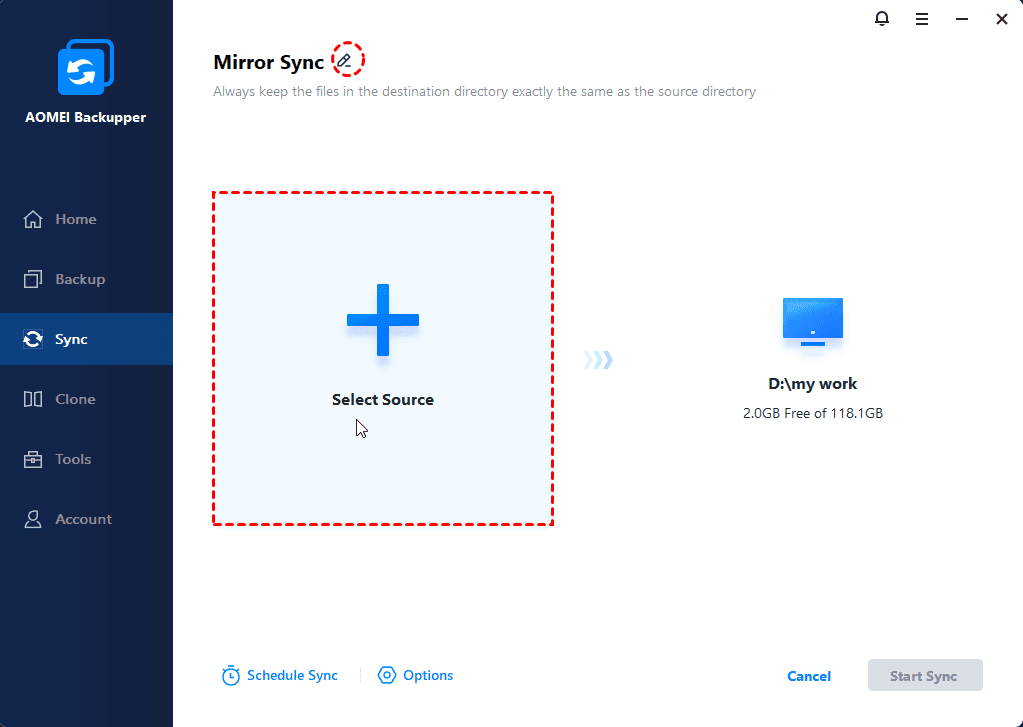
2. You can click the edit icon to modify the name of this Mirror Sync task to help you distinguish it from other sync tasks. Click "Add Folder" to select the folder which you want to synchronize.
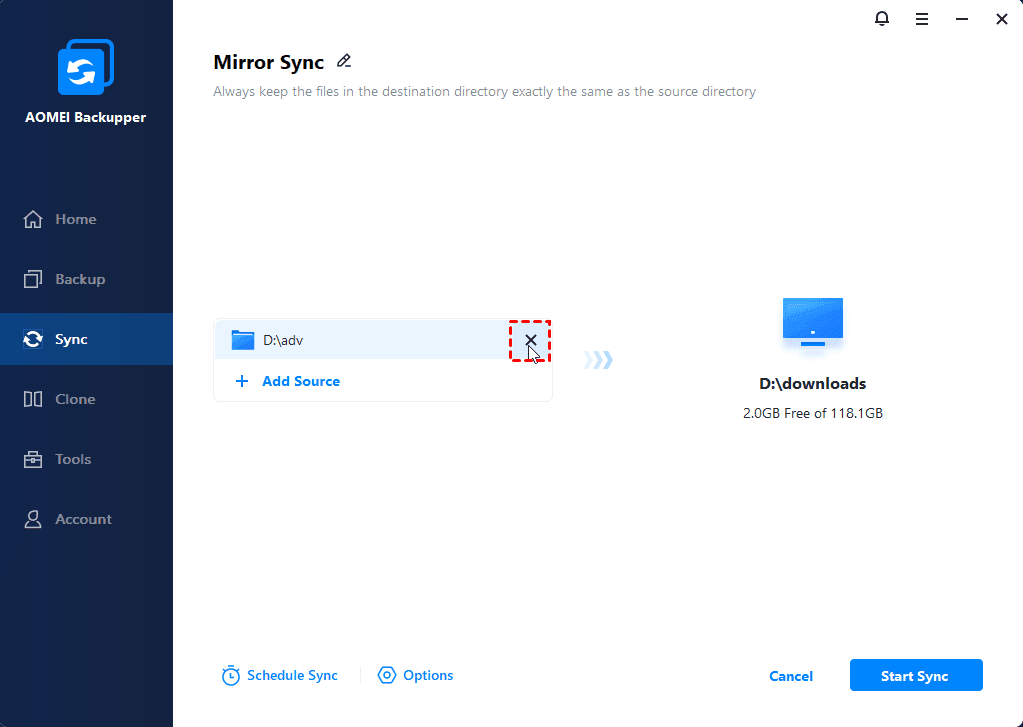
Tips: You can add multiple folders one by one and you can also click the trashcan icon to delete the wrongly selected folder.
3. Select a destination location to store the folder.
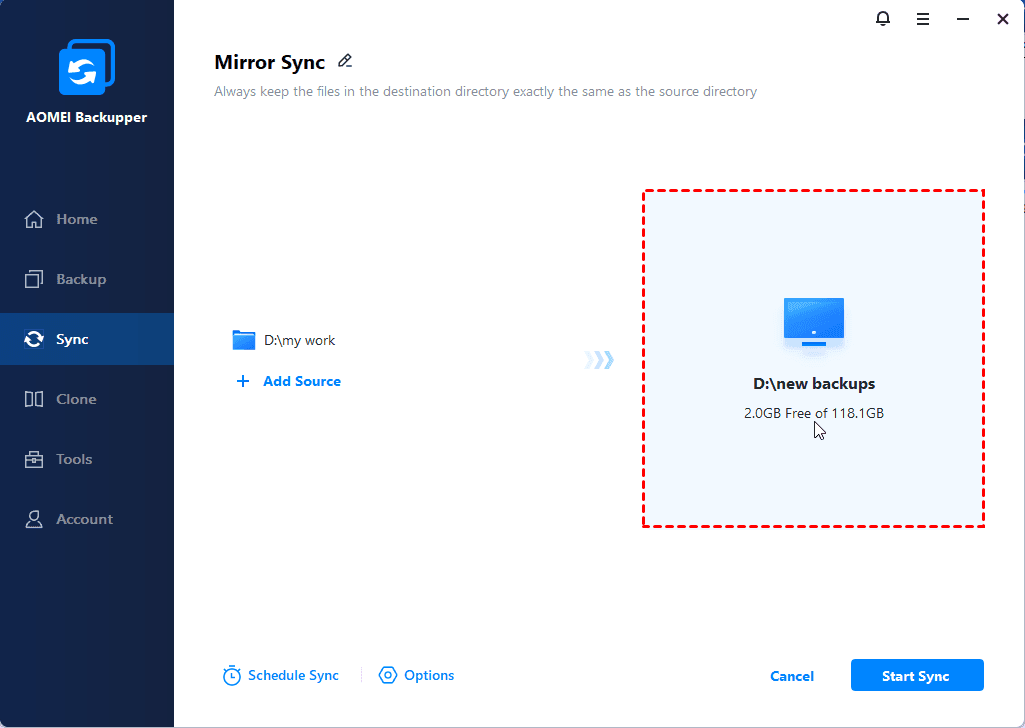
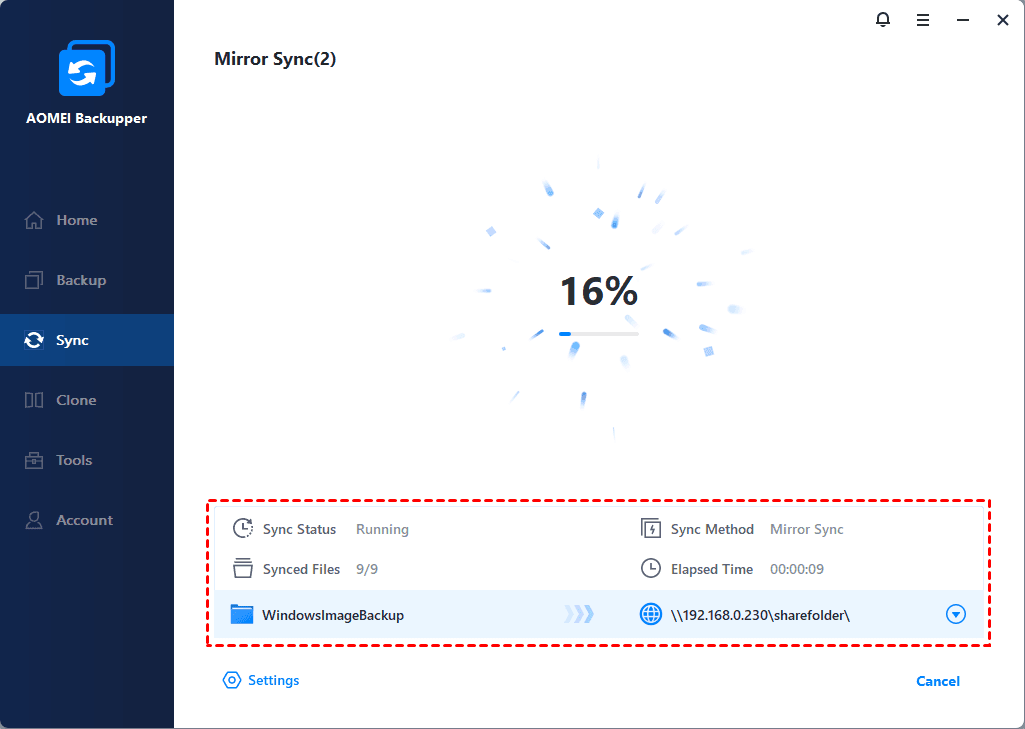
4. Click "Start Sync" to launch the syncing process.
Tips:
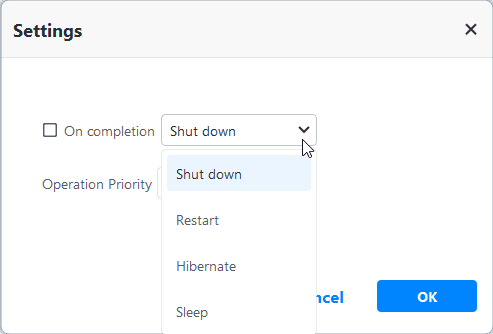
- While sync is running, you can click an icon in the lower-left corner to set to Shut down/Restart/Hibernate/Sleep PC after sync completion.
- When the sync is running, you can also click the underlined sentence to check the sync process in detail.
5. Please kindly wait for the sync process to complete and then click the "Finish" button.

Here are different results referring to different operations:
-
After creating a mirror synchronization task and running it once, the files in the source directory and the target directory will become exactly the same.
-
If you edit the files in the source directory and then run the mirror synchronization, the files with the same name in the target directory will be overwritten/replaced by the edited files in the source directory.
-
If you edit a file in the target directory and run mirror synchronization, the file will also be overwritten/replaced by the file with the same name in the source directory.
-
If you run mirror synchronization after adding a file in the source directory, the file will be copied to the target directory to keep it exactly the same as the file in the source directory.
-
If you add a new file to the target directory and run mirror synchronization, the file will be deleted to keep it exactly the same as the file in the source directory.
-
If you delete a file from the source directory and then run synchronization again, the file with the same name in the target directory will be deleted.
-
If you delete a file from the target directory and then run synchronization again, the file with the same name in the source directory will not be deleted. On the contrary, AOMEI Backupper will copy the file with the same name from the source directory to the target directory to keep the files in the source directory and the target directory exactly the same. Mirror synchronization is always based on the source directory.
Sync Settings
When creating a new Mirror Sync task, you will find a "Options" button in the lower-left corner of the interface.
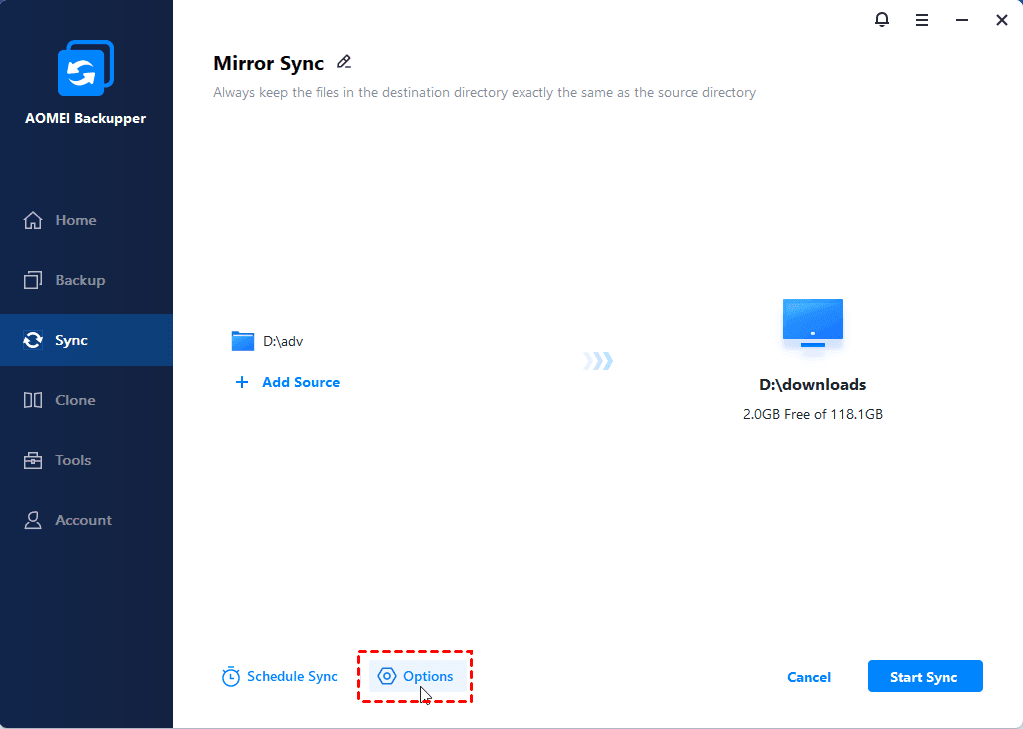
Click the button and you will show "General", "Command" and "Advanced" options.
General
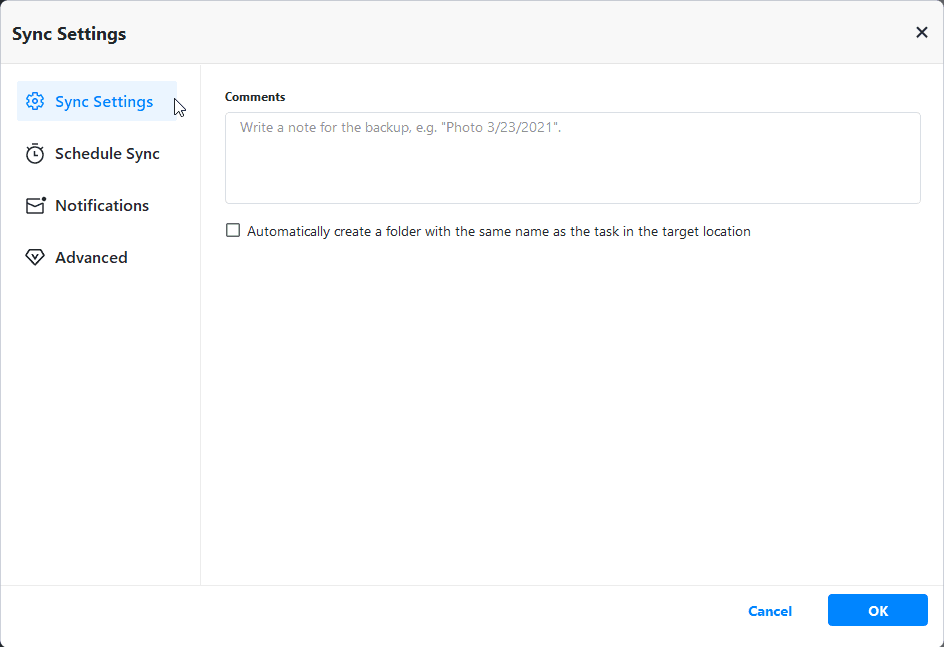
- Comments: Write a note for your task to help you distinguish it from other backup tasks.
- Email notification: In unattended operations, a notification can be emailed containing the result of each backup.
Command
In this option, you can set the pre-command and post-command.
Advanced

- Operation Priority: Please select the operation priority of the task. The higher the priority it is, the faster the task execution speed will be.
- Others: If you need the same name as the Basic Task folder in the destination, you need to tick the box "Automatically create a folder with the same as the task in the target location" before you create the basic sync task. (This option is unticked by default.)
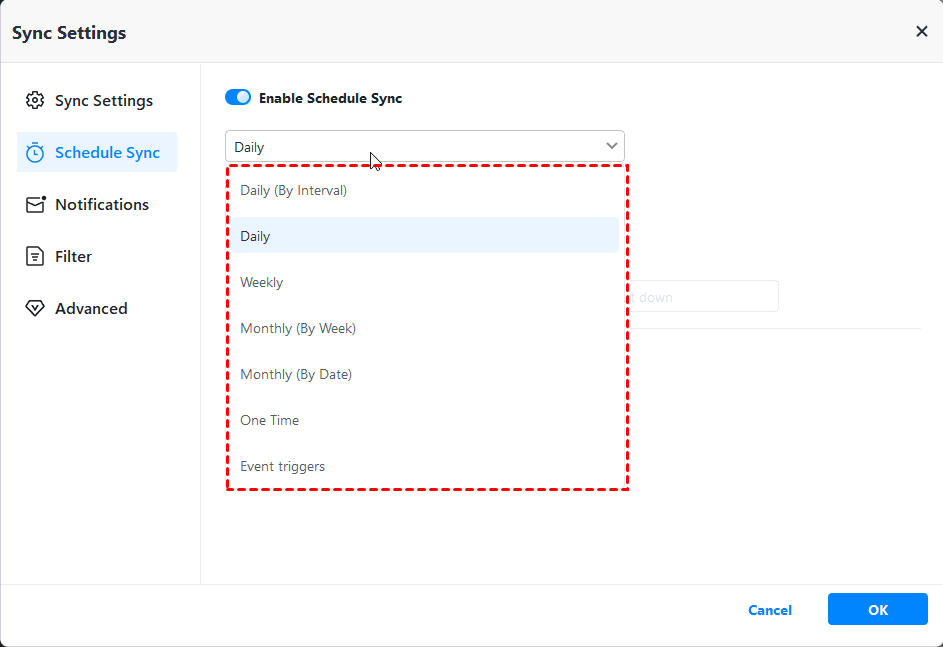
Schedule Sync
Select the “Schedule Sync” option upon which a dialog box will appear. Schedule the required sync task to sync files Daily, Weekly, Monthly, etc. Also, Event triggers and USB Plug in can be used as a sync method. Please click here to know more details.
Notes:
-
Mirror Sync only supports one-way sync. That’s to say, it only can sync from source to target.
-
File Sync supports VSS (Volume Shadow Copy Service), therefore, it can normally synchronize files that are being used or occupied by other programs. but, you need to make sure that the "Volume Shadow Copy" service in your computer is enabled status. However, if some files are in use by other programs exclusively, they are not synchronized.
-
If there are some special system files or folders with special security attributes in source folders, they are not synchronized, and the program will prompt you to skip them.
-
After synchronizing files, any changes on target files and folder such as delete, add or rename one of them, will cause the target files or folder to be inconsistent with the source ones. This situation will not benefit file management.
-
If the target path was located in FAT/FAT32 partition, files larger than 4GB will not be synced to the target path. Because a single file larger than 4GB cannot be stored on FAT/FAT32 partition.
Conclusion
File mirroring synchronization is typically automated and involves periodic or real-time checks to update the target file based on differences with the source file. This ensures that the content and state of the files remain consistent, providing data integrity and reliability.
FAQs:
Q: What is the difference between mirror sync and basic sync?
A: Basic Sync is a feature which allows you to synchronize folders to other locations, such as an external hard drive, NAS, removable USB flash drive, etc. For Basic Sync, it is like Window's "copy" feature and it would not create image file after sync process is done so you can view your contents at any time.
Mirror sync is a feature that ensures the newly added and modified files in the source directory will be synchronized to the target directory, and the files in the target directory will always be exactly the same as the files in the source directory. Files in the target directory that are inconsistent with those in the source directory will be deleted or overwritten.
Q: Sync failed, error code 53 reported.
A: Please upgrade to the latest version 7.2.3 then see if it works